

Model transformation of conceptual data models to logical data models using QVT-Operational Language
This is an introductory tutorial to showcase how QVT-Operational language can be used to perform model transformations.


Table of contents
What is QVT?
Query-View-Transformation (QVT) is a standard set of languages defined by the Object Management Group to perform model transformations.
The QVT specification includes three languages:
Relations Language
Core Language
Operational Language
This tutorial uses Operational QVT or QVTO standard for the transformations.
Data Modeling
Data modeling is the process of creating a visual representation of either a whole information system or parts of it to communicate connections between data points and structures.
Types of Data Models
Conceptual Data Models
It is a visual representation of database concepts and the relationships between them showcasing a high-level user view of data.
Logical Data Models
This model expands on the conceptual data model and defines the structure of the data entities and their relationships with more details.
Physical Data Models
This schema or framework defines how data is physically stored in a database.
Implementation
Step 1 : Developing Conceptual Data Models
Let us develop a conceptual data model using Eclipse. The plugin I am using for the model development is Papyrus For UML. We can download it by clicking on Help -> Install new software and search papyrus for uml in all available sites.
Create a Papyrus project in eclipse. Click File -> New -> Project and we can find Papyrus Project option when we search for it.
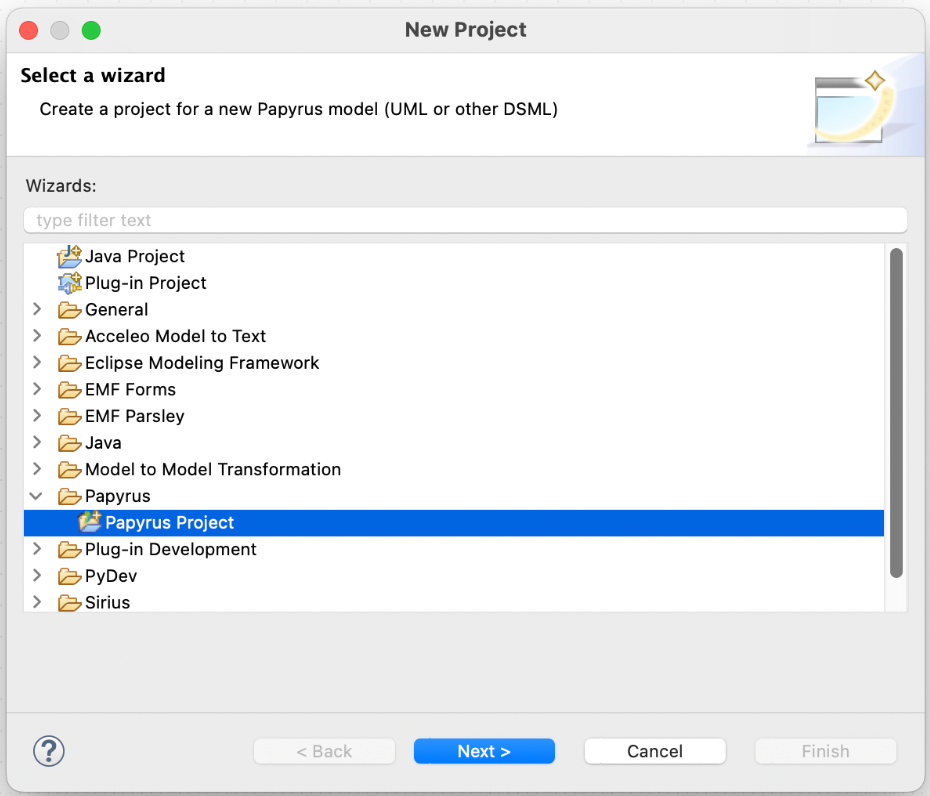
New Project Wizard
After creating a project, we need to create an UML Class diagram with conceptual data elements!
To create an UML model, right-click on the project, select New -> Other and we get the following options
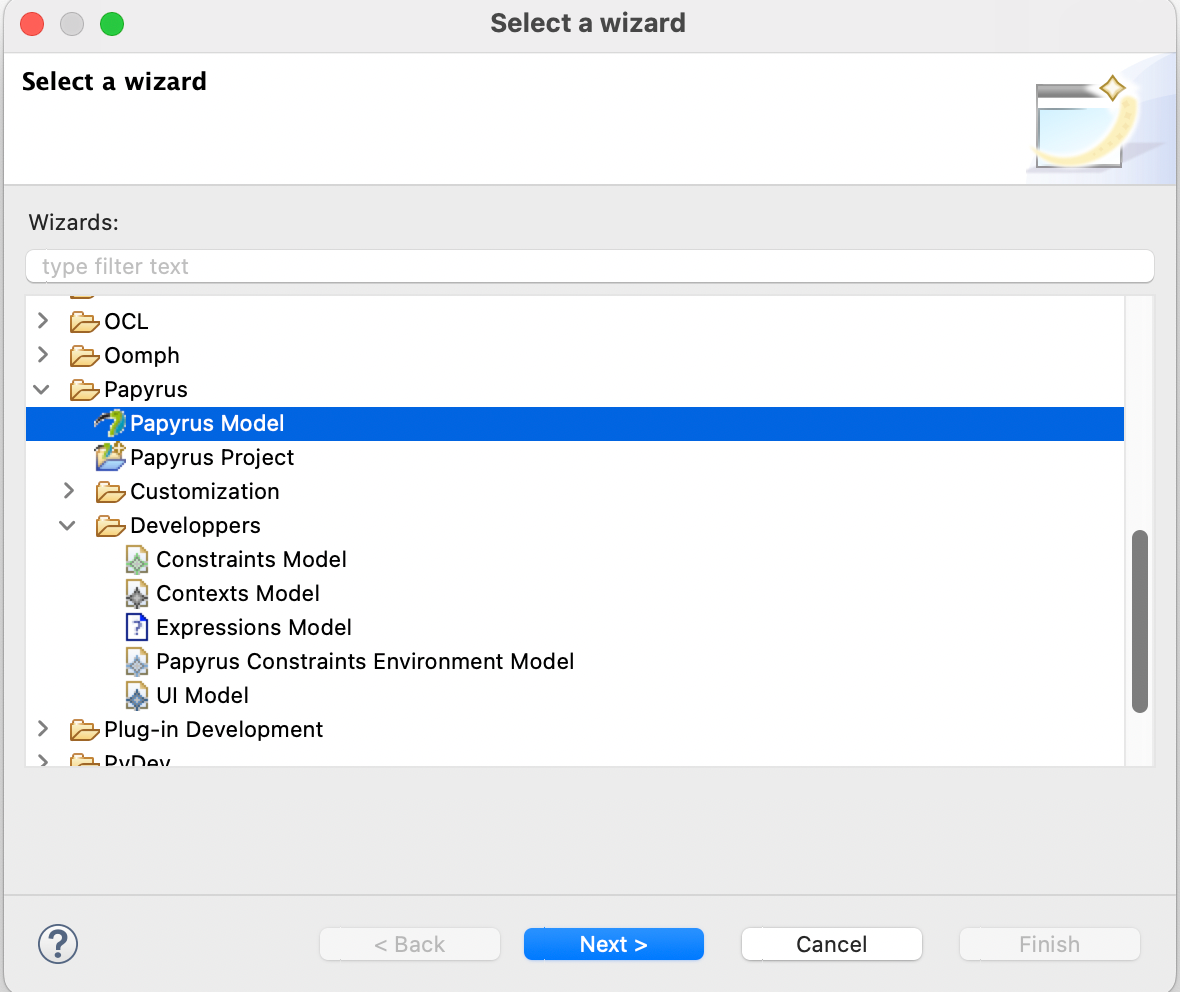
Select Papyrus Model and continue to click on next where we get options to set name for our model and the type of Representation. (Choose Class Diagram)

If you followed the steps as mentioned, you will have a project with following files.

Project file structure
When we create a papyrus UML diagram, it provides us with three files
.di file — This is the file which provides us with the visual view of the UML model
.notation file — It consists of config details for the UML model visualization
.uml file — XML format of the UML model
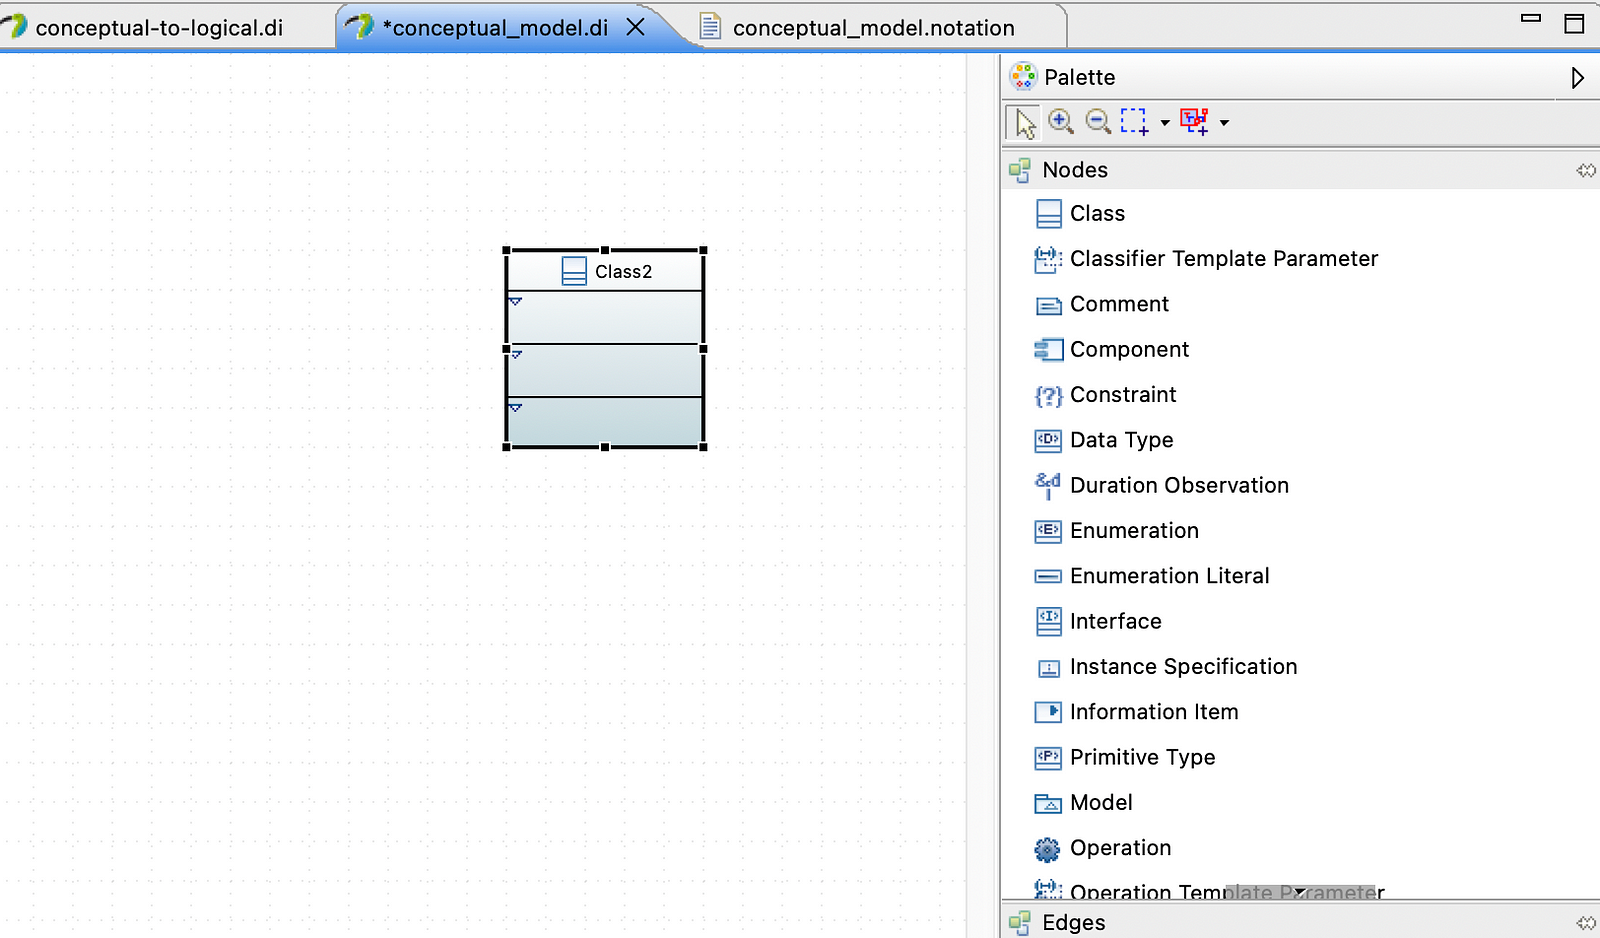
Now, double-click on the conceptual-to-logical.di file to open a blank model development environment.
On the right side of the Eclipse IDE, we can see the following palette
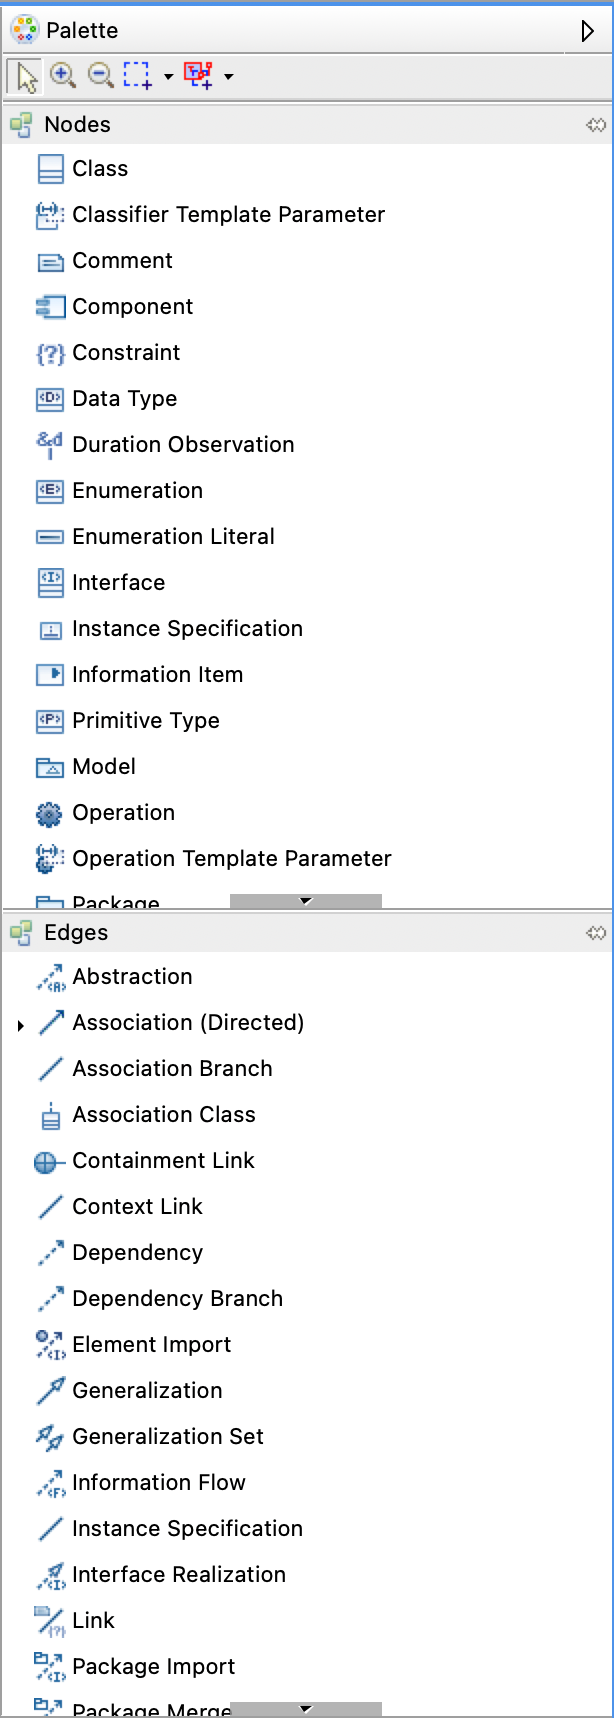
We can drag and drop the model elements from the palette onto the whitespace modelling environment.
Now, let us develop a basic conceptual model for the demo. I have dragged and dropped three class nodes and renamed them as STUDENT, TEACHER and COURSE.
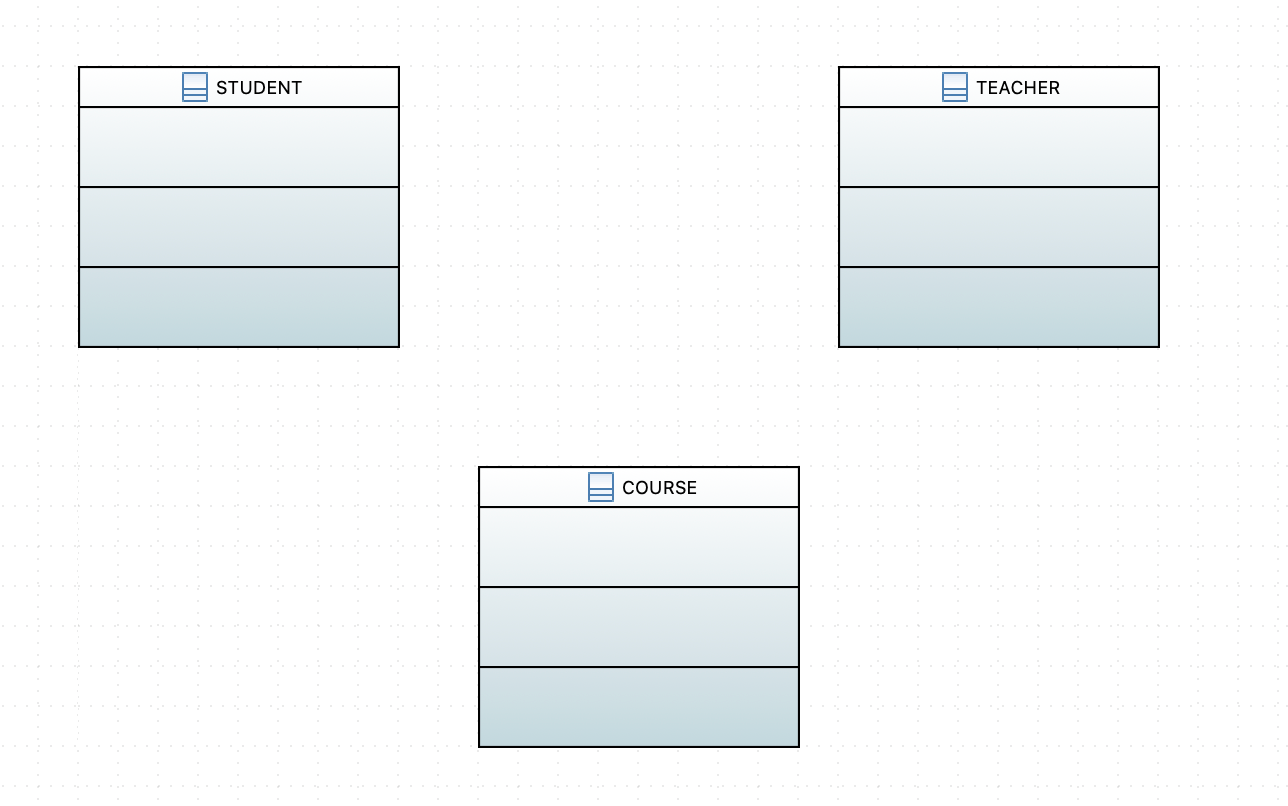
Conceptual Data Model
In the palette, we can find the Edges option as well. Let us use the Association relationship between the classes.
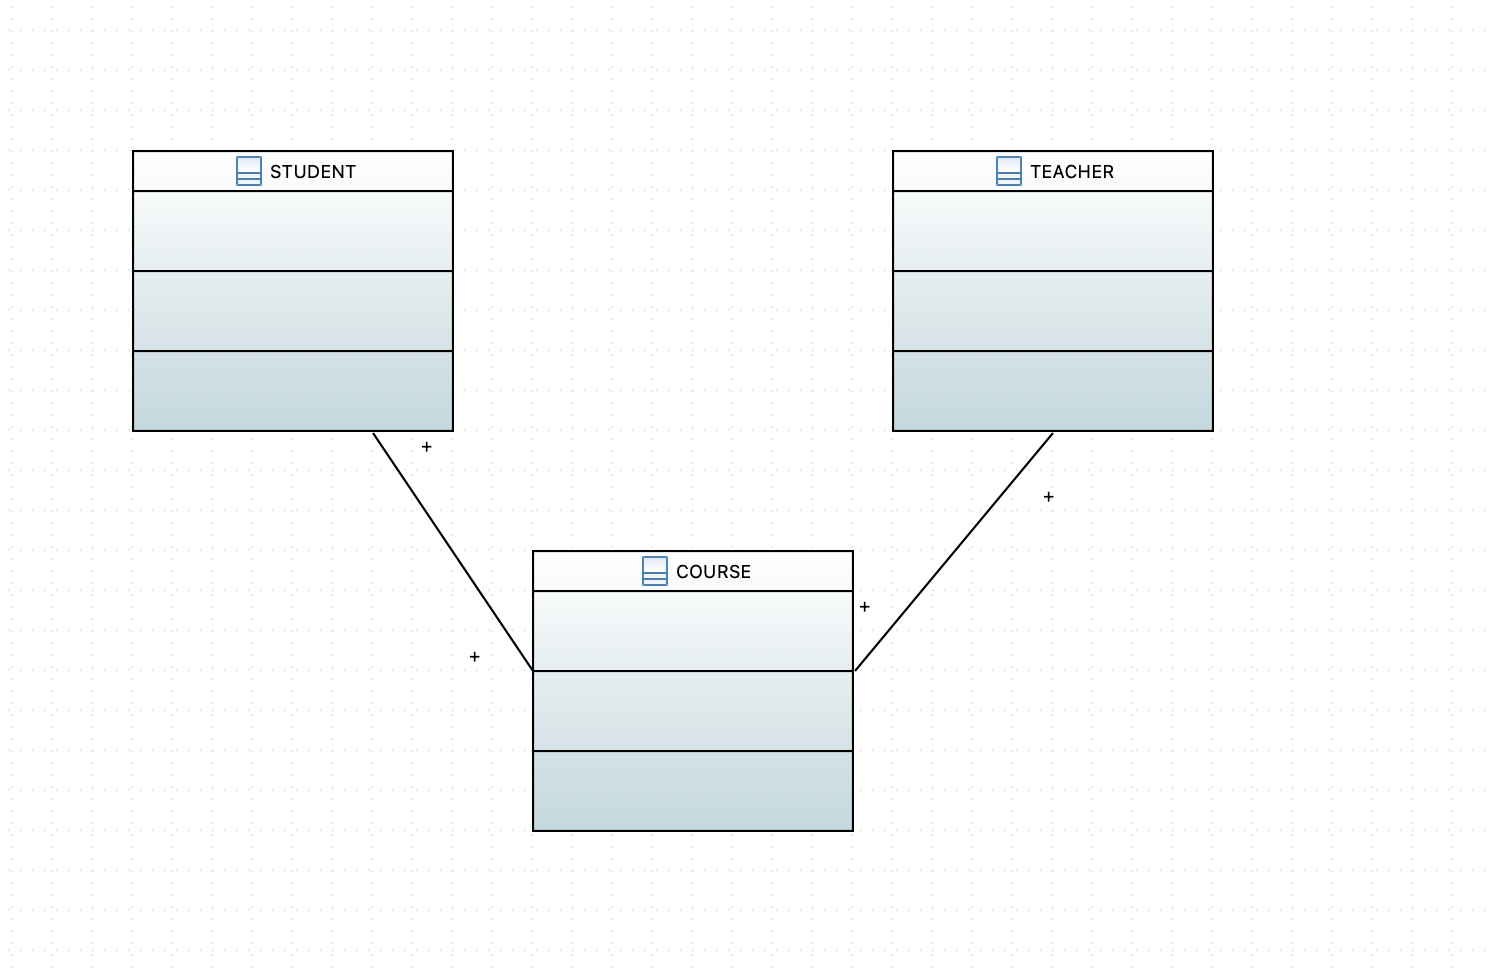
STUDENT-COURSE and COURSE-TEACHER have an association relationship between them.
When we double-click on the .uml file, we get the following content.

Now, we have our conceptual data model and let us move to the next step.
If you want to learn more about how to develop UML diagrams using papyrus, refer to the following link https://www.eclipse.org/papyrus/
Step 2: Building QVTO script for model transformation
Now, let us build a QVT script which parses through this model and allows us to map the elements from the source UML model and generates a new target model with additional properties.
To run QVT scripts in Eclipse, we need to install the QVT Operational Tools which we can find by clicking on Help →Install Software and search for QVT Operational in All Available Sites.
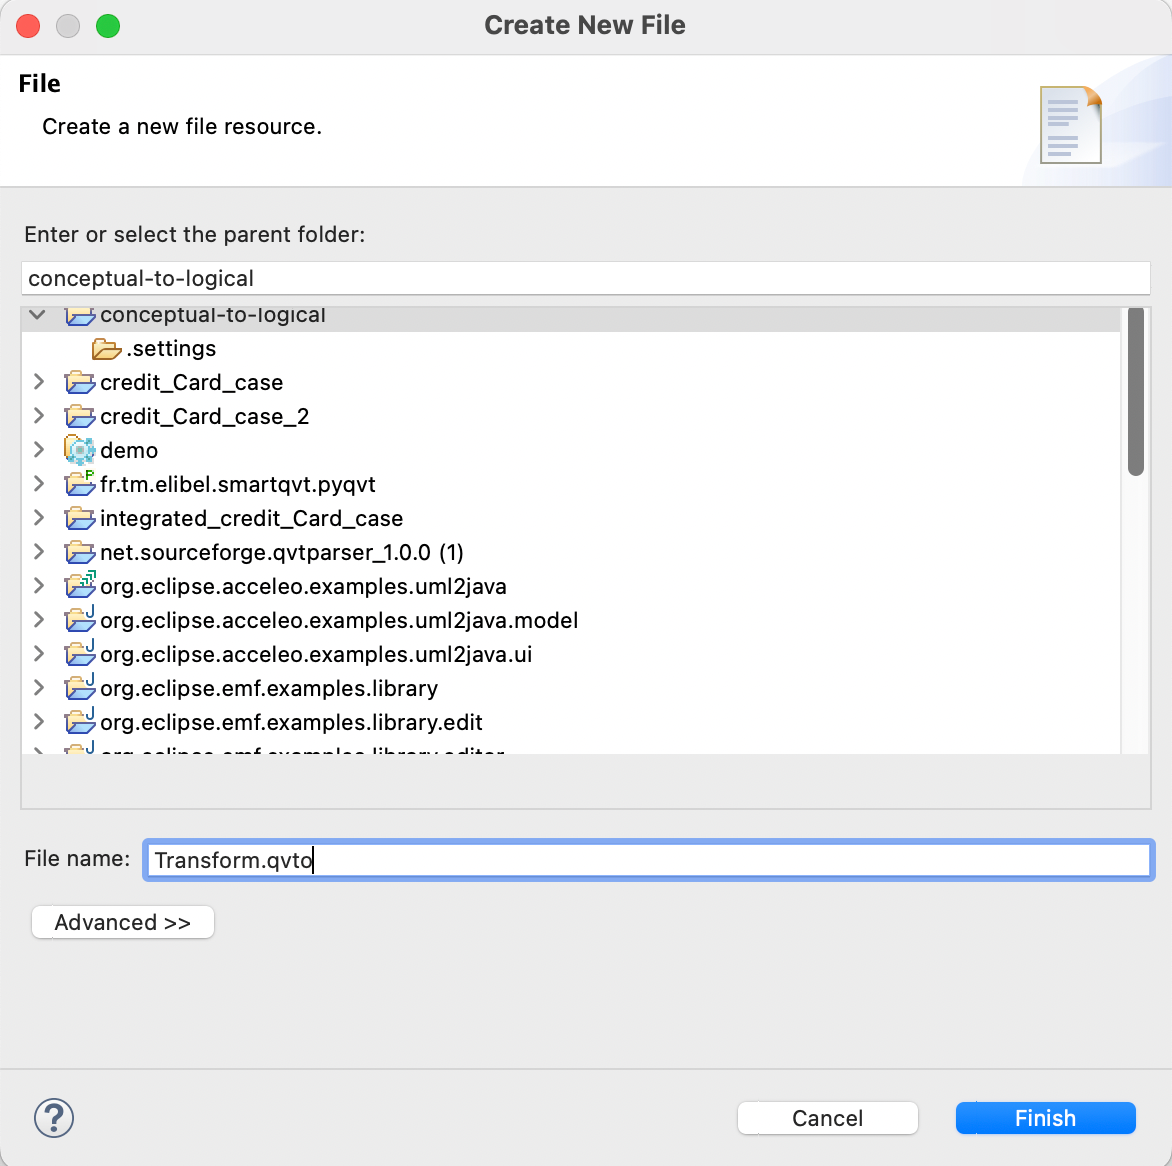
After successfully installing the QVTO SDK, right-click on the project to create a new file : Transform.qvto
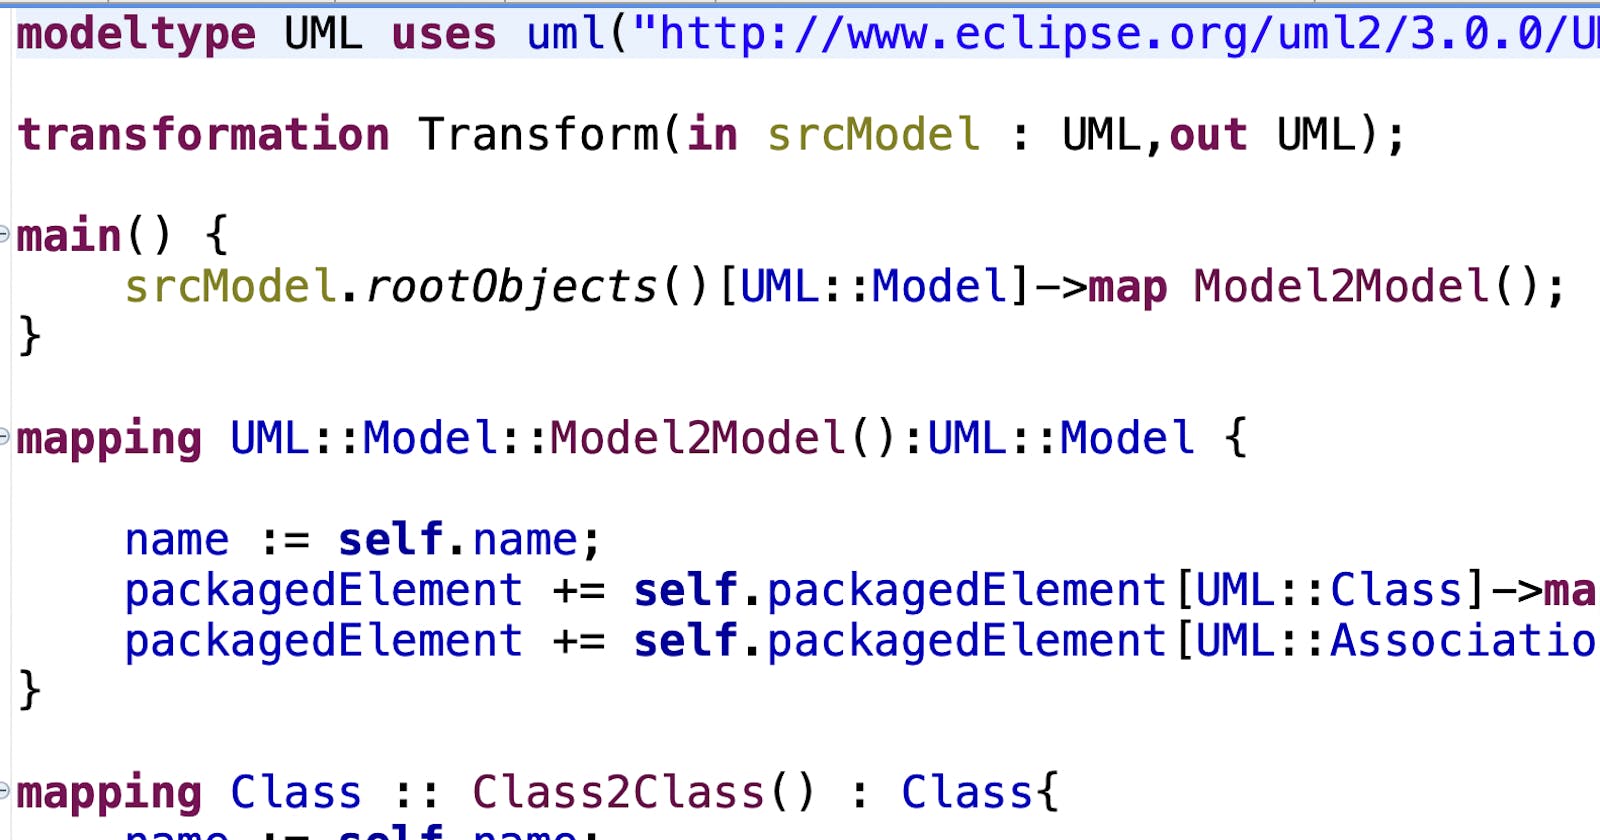
Open the file and start to import the required metamodels. In our example, we only require UML metamodel.
modeltype UML uses uml("http://www.eclipse.org/uml2/3.0.0/UML");
The next step is to define the transformation input and output parameters.
transformation Transform(in srcModel : UML,out UML);
Similar to other programming languages, main() is the entry function. In this function, we are going to access the rootObjects of source uml model and set a mapping function on it.
main() {
 srcModel.rootObjects()[UML::Model]->map Model2Model();
}
The mapping function in QVT allows us access to two model elements
Source Model Element
Target Model Element
We can access the attributes of Source model element using self and modify it as required. General practice is to delve into mapping nested model elements from the corresponding parent element.
mapping UML::Model::Model2Model():UML::Model {

 name := self.name;
 packagedElement += self.packagedElement[UML::Class]->map Class2Class();
 packagedElement += self.packagedElement[UML::Association];
}
The function signature consists of mapping keyword, input and output model element and function name. From Model2Model() function, we call a mapping function for the nested model element — Class.
When working on the GUI model editor, Property Node has the following attributes.
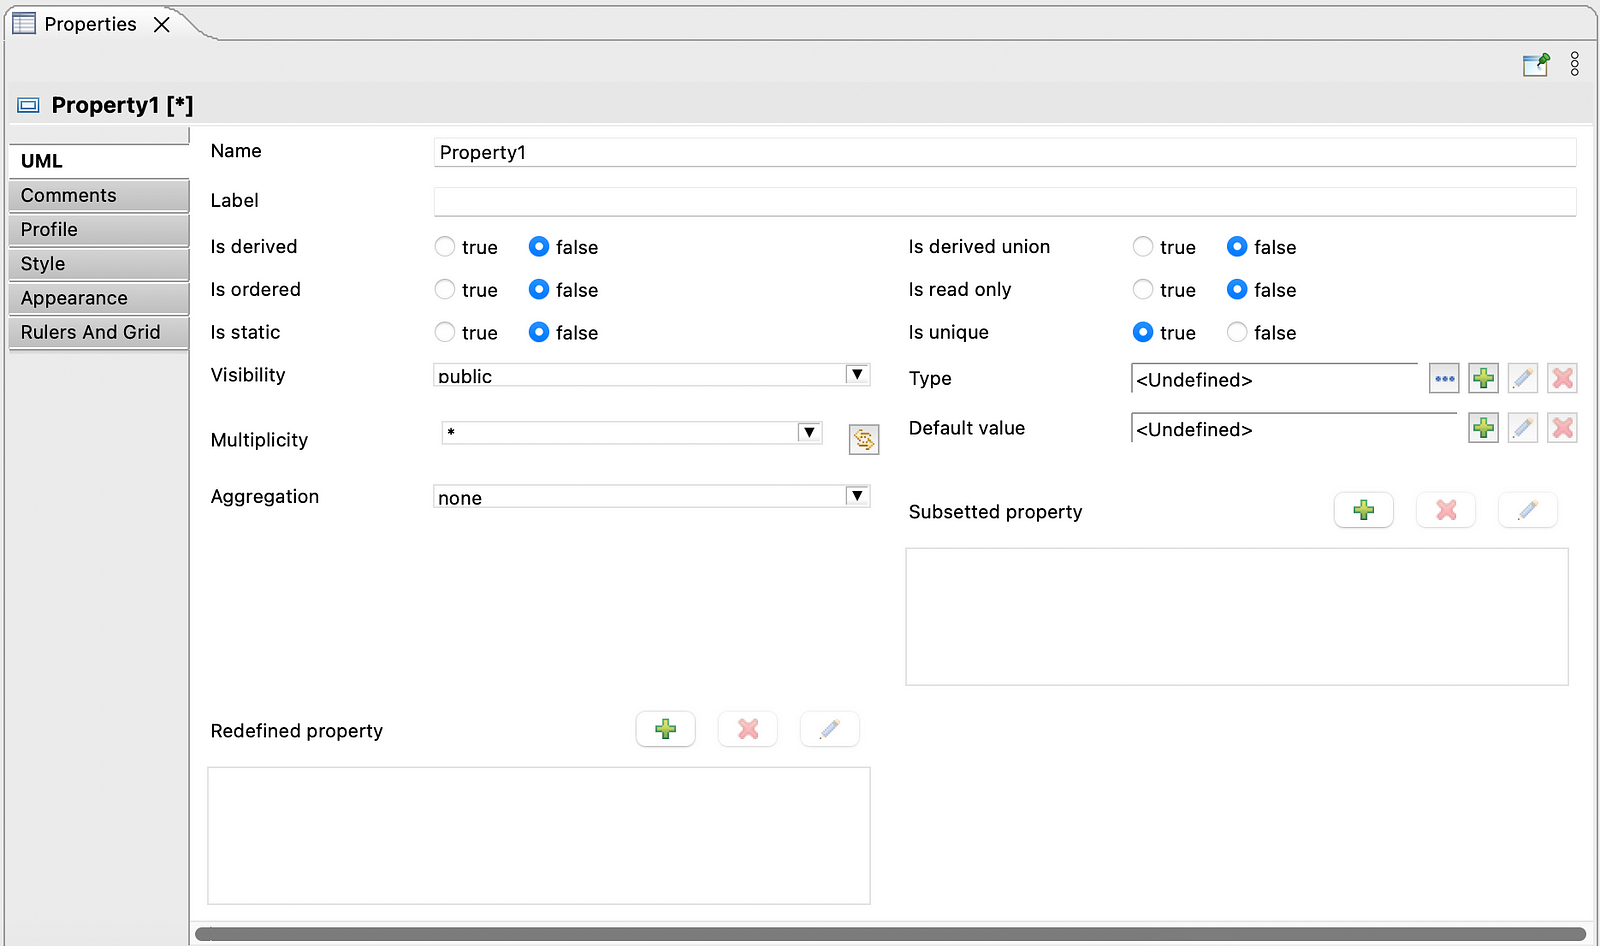
Properties view can be opened up either as one of the options under right-click or Window -> Show View -> Other -> Properties.
QVT allows us to access the attributes and certain attributes can be modified as well.
mapping Class :: Class2Class() : Class{
 name := self.name;
 if(self.name = "STUDENT"){
  var studentName = object Property {
        name := "StudentName";
        isDerived := false;
        isUnique := false;
        _default := "Student";
        lower := 1;
        upper := 1;
     };
     ownedAttribute += studentName;
 }
 else if(self.name = "TEACHER"){
  var teacherName = object Property {
        name := "TeacherName";
        isDerived := false;
        isUnique := false;
        lower := 1;
        upper := 1;
     };
     ownedAttribute += teacherName;
 }
 else if(self.name = "COURSE"){
  var courseCode = object Property {
        name := "CourseCode";
        isDerived := false;
        isUnique := true;
        lower := 1;
        upper := 1;
     };
     ownedAttribute += courseCode;
 }
}
In Class2Class mapping function, we are adding new properties into the class using QVT by mapping the attributes like name, isDerived and more. We also need to append the property object into the ownedAttribute tag to link it to the class.
The packagedElement, ownedAttribute is the UML specific terminology, that is, the XML view of the UML model consists of these tags.
To view in XML, Right click on .uml file and open as text editor. This file format is essentially the XMI — XML for metadata interchange format.
In real world scenario, each entity will have multiple properties. Since this is a beginner-level tutorial, we are adding only one property per class.
Step 3: Executing QVTO script for model transformation
Now let us run the QVT script. Right-click on the .qvto file and select Run As-> Run Configurations and the following window pops up.
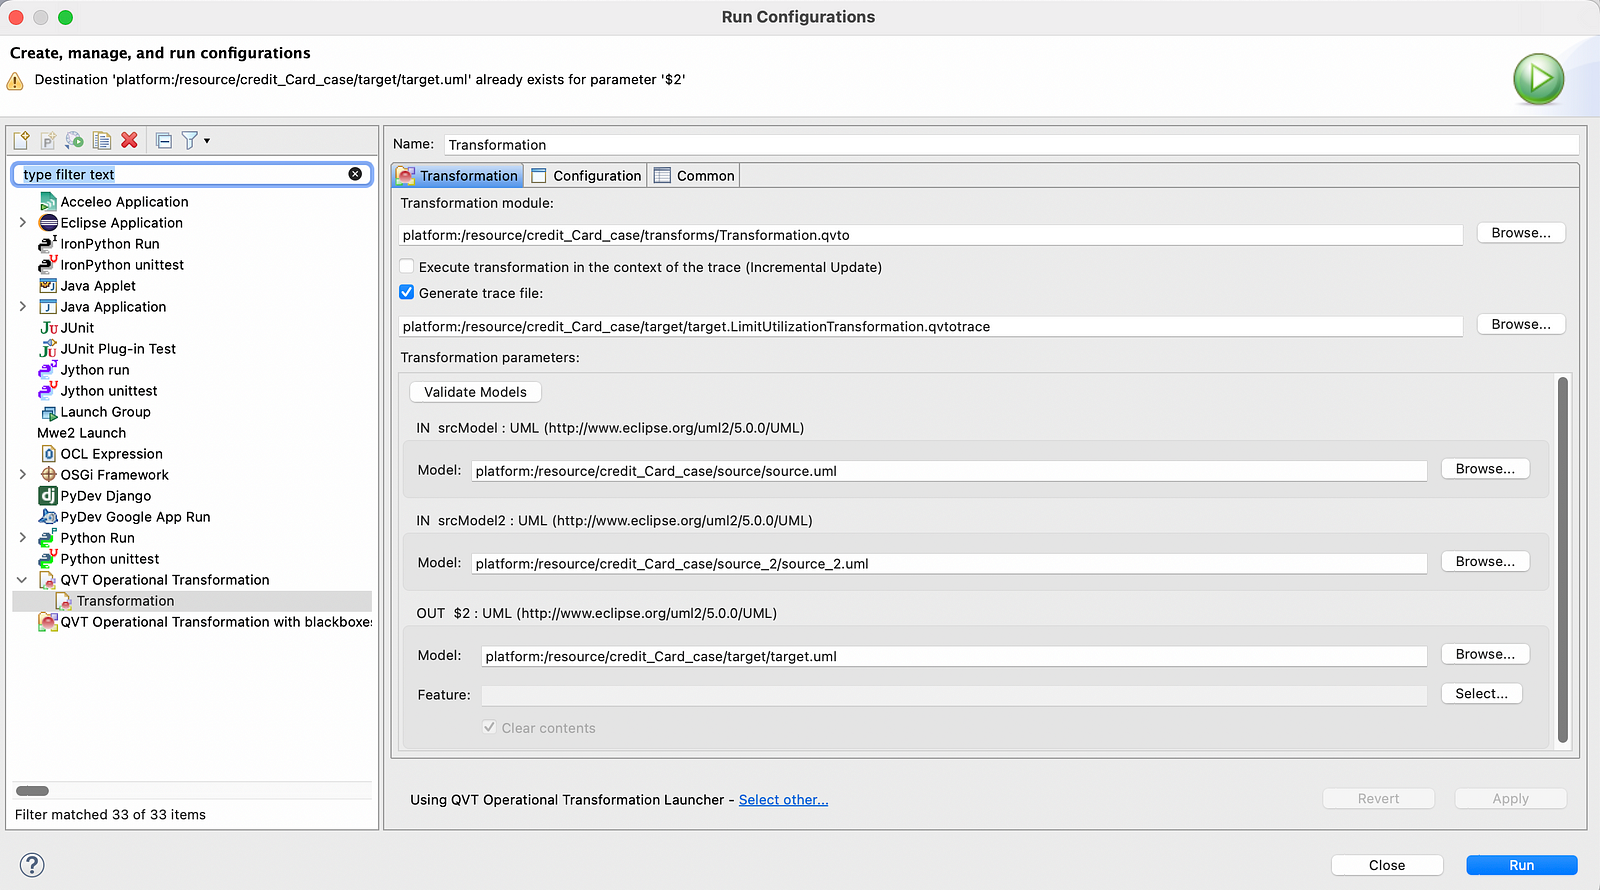
Now right-click on QVT operational transformation and create a new configuration
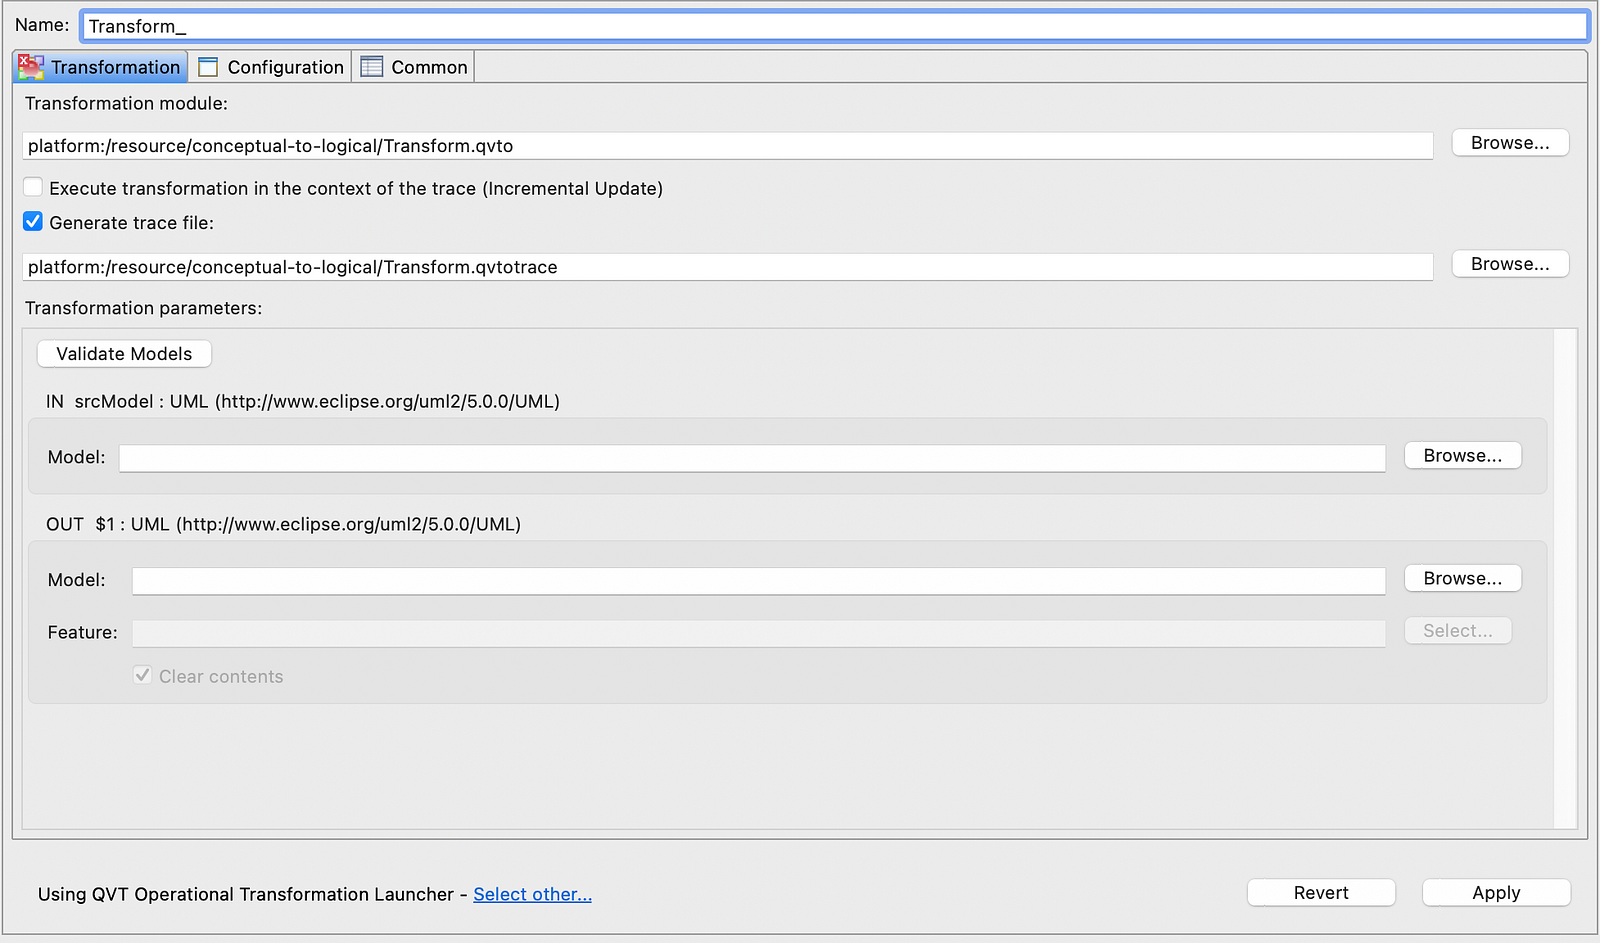
Now define the paths for source and output models. Note that the input file should be of .uml file in our project. For output file, we can give a new name for the model to be created.
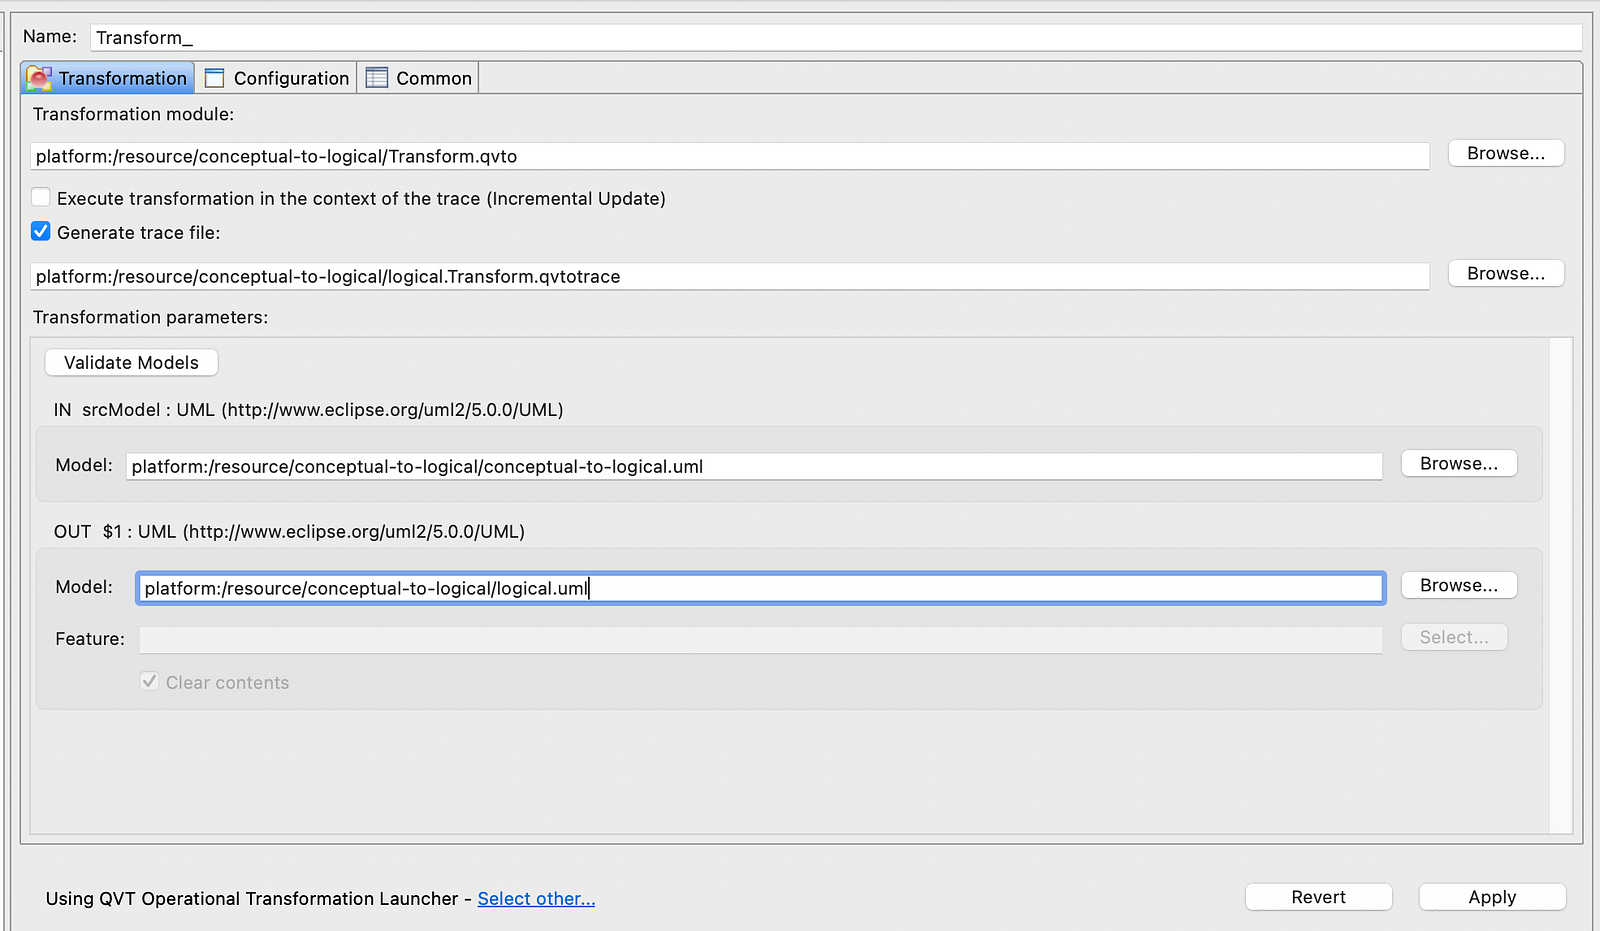
Now click apply and then Run.
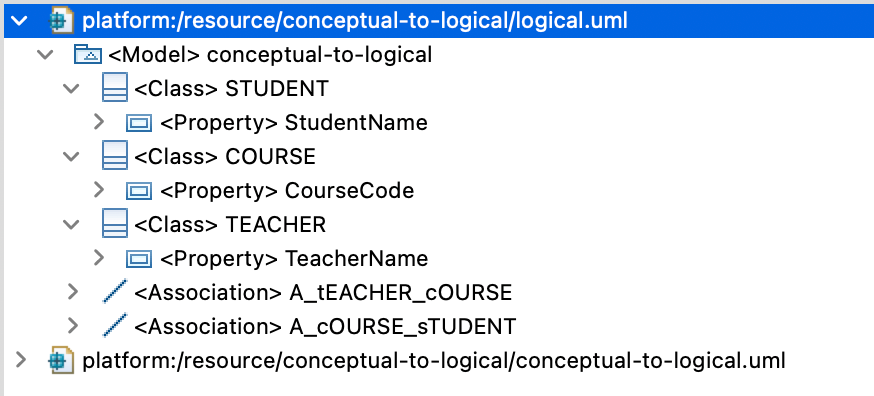
We can see the UML model generated by the QVT script. We have successfully taken the input UML model and added properties to each of the Class.
Conclusion
In this tutorial, we have seen a high-level view of how QVT-O can be used to perform model-to-model transformation. We saw how we can convert a conceptual UML model to a logical UML model. QVT-O can also be used for logical to physical model transformation but that is for another tutorial.
You can find the project code at https://github.com/antoprince001/QVT-O-Transformation
References
https://www.youtube.com/watch?v=69HQb1u1C-E
https://thesai.org/Downloads/Volume2No5/Paper%202-QVT%20transformation%20by%20modeling.pdf
https://www.slideshare.net/HusseinAlshkhir/query-views-transformations-qvt-71236454